Basic Arduino Program
- Home
- Basic Arduino Program
Blinking of LED
What is Light Emitting Diode (LED): The LED is a PN-junction diode which emits light when an electric current passes through it in the forward direction. In the LED, the recombination of charge carrier takes place. The electron from the N-side and the hole from the P-side are combined and gives the energy in the form of heat and light. The LED is made of semiconductor material which is colourless, and the light is radiated through the junction of the diode. The LEDs are extensively used in segmental and dot matrix displays of numeric and alphanumeric character. The several LEDs are used for making the single line segment while for making the decimal point single LED is used.

Connection Diagram:
Hardware Required
-
- 1 × Arduino Board:
-
- 1 × Breadboard
-
- 1 × LED:
-
- 2 × Jumper wire
-
- 1 × 220 ohm resistor

Once the circuit has been created on the breadboard, you’ll need to upload the
program to the Arduino. The sketch is a set of instructions that tells the board what functions it needs to perform. An Arduino board can only hold and perform one sketch at a time.
Programming Steps:
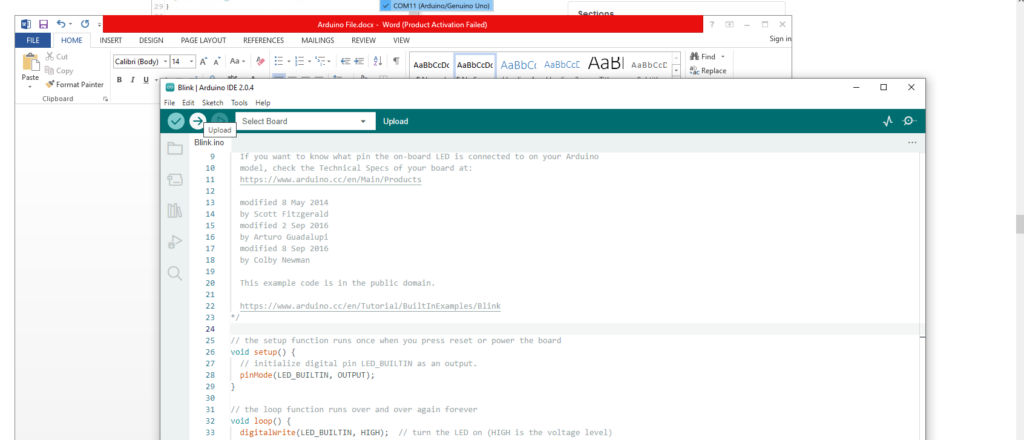
Step1: Open the Arduino IDE and then Blink example by going to: File > Examples > 01.Basics > Blink.

Step2: Connect theArduino board to the PC/Laptop using USB cable and select the appropriate Arduino board and COM port as shown below. For board selection go to Tools > Board > Arduino Uno. For COM port selection go to Tools > Port > COM7. The Arduino can show on a different port depending upon USB connection, select that port.


Step 3: With your Arduino board connected, and the Blink sketch open, press the “Upload” button.


If everything worked, the onboard LED on your Arduino and connected LED should now be blinking. Congratulations! You just programmed your first Arduino!
Output:

Blink Program:
void setup()
{
pinMode(LED_BUILTIN, OUTPUT);
// initialize digital pin LED_BUILTIN as an output.
}
// the loop function runs over and over again forever
void loop()
{
digitalWrite(LED_BUILTIN, HIGH);
// turn the LED on (HIGH is the voltage level)
delay(1000);
// wait for a second
digitalWrite(LED_BUILTIN, LOW);
// turn the LED off by making the voltage LOW
delay(1000);
// wait for a second
}
Explanation of Code:
Every Arduino sketch has two main parts to the program:
void setup() – Sets things up that have to be done once and then don’t happen again.
void loop() – Contains the instructions that get repeated over and over until the board is turned off.
pinMode() – Used to initialize the Arduino pins (i.e. LED_BUILTIN is Pin No.13) in either INPUT or OUTPUT mode.
digitalWrite() – Used to alter the status of the pin HIGH or LOW.
delay () – Provides delay (in milliseconds) between two tasks executed by Arduino.
